Sunday, December 27, 2015

Christmas 2015 - Ugly Sweater Nails

I hope everyone had a great Christmas.  I can't believe it's over already.  I only did one Christmas themed look this year.  And actually, I ended up doing it twice.  The week of Christmas got a little hectic.  I needed to redo my nails, I had already been wearing the design for a week, so they were starting to look a little beat up.  But I just didn't have the time, or energy, to play around with a new look.  I still had all the same supplies out, and since I liked how they came out so much the first time, I just decided to redo the same design.  

MoYou London Festive 06

The base was sort of a recycled look for me.  I had used this same tape mani combo several years ago during the holidays, but for a snowflake look instead.  I started with 2 coats of China Glaze Poinsettia, then one coat of China Glaze Ring In The Red.  I top coated with Seche Vite and made sure it was completely dry before taping off my nails on the diagonal with just regular scotch tape.  Then I applied a thicker coat of China Glaze Glittering Garland, top coated and let dry before stamping.  The sweater stamp is from MoYou London Festive Collection 06, and I stamped the design with white Konad Special Polish.

MoYou London Festive 06

MoYou London Festive 06

I also gave my nails a little trim this month because of a few broken corners.  I wasn't thrilled with the idea of making my nails shorter, but in hindsight, it really worked out to be good timing; I don't think this stamp would have fit as well on my nails at the length they were before I filed them back.  

MoYou London Festive 06

I was really happy with how this look turned out.  I only had to redo a couple nails each time I wore this, because I thought I stamped the design a little crooked a time or two.  I always top coat my polish before I stamp, that way I have a little barrier of protection over my base polish in case I need to re-stamp a nail.  I can carefully wipe off the stamping polish with polish remover and a q-tip, without completely messing up the polish below.  And I was happy to pull out Ring In The Red from my melmer for the first time in a while.  That is still probably one of my favorite China Glaze glitters.

Saturday, October 31, 2015

Happy Halloween 2015!

Halloween nails

Happy Halloween!  Just one mani for me this Halloween.  The orange polish is Zoya Arizona, and the gradient is Pansy-Monium and My Life's Porpoise, both from KBShimmer.  Everything was stamped using Rica Blackout stamping polish.  The skulls is a design from MoYou London Biker Collection plate 08, while everything else is from Bundle Monster.  The bats design is off of plate BM-H08, both the text design on my ring finger nail and the spider web on my pinky nail are from plate BM-H07.

Halloween nails

Halloween nails

Going into it, I was originally planning to have all my nails be different base colors.  It wasn't until after I finished the two middle nails that I decided to scrap that idea and throw down a few coats of orange on my index and pinky nails too.  Otherwise, I would have most likely put the gradient on my ring finger nail as an accent, instead of my middle finger.  But really, there's no rules when it comes to accent nails, and I really like the overall look with the accent nail just where it is.  The gradient with bats stamp also went on my camera shy thumb nails.  I really love the look of the purple to grey gradient, I think I may need to use it for a full mani someday.

Halloween nails

Have a fun and safe Halloween weekend!

Thursday, October 29, 2015

Shangri-La Abstract Stamping

Bundle Monster BM-S105

For the past month or so, I've been in a nail art slump.  I just haven't felt motivated to do anything other than switch out the polish on my nails.  Seeing this look though, that I wore pre-slump, is reminding me why I got into nail art in the first place, and also that a manicure doesn't have to be super complicated to have it turn out to be one of your favorites.

Bundle Monster BM-S105


This mani was actually from back in July, I just never got around to using it in a post until now.  It had been a little while since I'd done any matte nails, and I was loving a look that Oooh, Shinies! had posted at the time.  It made me think about the China Glaze Romantique collection, which I had purchased online ages ago solely to use the polishes for stamping.  I also had just recently ordered the Shangri-La Master Set from Bundle Monster and was itching to try out one of the new plates in the collection.

Bundle Monster BM-S105

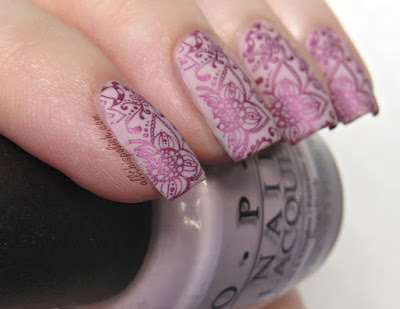
For my base, I started with a polish probably almost as old as the Romantique Collection, OPI Steady As She Rose.  Then I stamped part of the design from plate BM-S105 with China Glaze Joy.  I finished the look off with one coat of OPI's matte top coat.

Bundle Monster BM-S105

I need to remember to pull out some shades from the China Glaze Romantique collection more often.  They are great for stamping, and they look amazing matte as well.

Monday, September 14, 2015

KBShimmer Fall 2015 Collection

Press Sample

KBShimmer Fall 2015 Collection

It's that time of the year, lots of brands are starting to release their Fall collections.  This Tuesday, September 15th, you can add KBShimmer to that list when they release their 2015 Fall Collection.  There are 12 new polishes in the collection, and today I've got swatches of 7 of the 12 to show you.

Thursday, September 10, 2015

Florida Sky Saran Wrap Mani

saran wrap nails

In one of the Facebook groups that I'm in, we've been doing a challenge where every week there is a new photograph posted to use as inspiration for a manicure.  Several weeks ago, it was my friend Alyson's turn to post a photo, and she chose a picture she had taken while visiting her sister in Florida.  It's posted below, but you can also see it here on Alyson's Instagram account.  I also highly recommend checking out her Facebook page, where she posts pictures of her nail art.  She's got some mad freehand skills that always leave me completely jealous.

https://instagram.com/p/6P0tY3r7Gb/

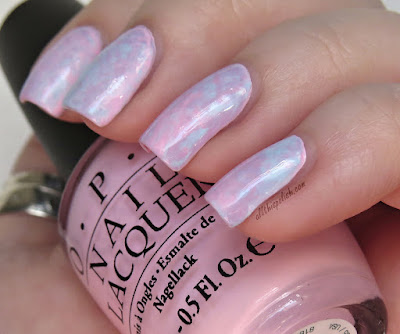
As soon as I saw the picture, I wanted to try to recreate the look of the sky with a saran wrap mani.  I started with a base of OPI Mod About You.  Once dry, and working one nail at a time, I dabbed different spots of my nail with OPI Rumple's Wiggin' and with Zoya Blu, then tapped my nail with small, balled up pieces of plastic wrap until some of the original base color started to show through.

saran wrap nails

There were a few times that I reapplied some polish, if I thought there wasn't enough pink (or blue or purple) on a particular nail, and then patted it with some more plastic wrap until I was happy with the final result.  I think my favorite nail though was on my ring finger, and I only needed to make one pass with the plastic wrap on that nail.

saran wrap nails

saran wrap nails

I was really happy with how these came out.  There wasn't as much contrast between the colors with this look as with my last attempt at saran wrap nails, but I love both versions.  And I think I did a decent job of mimicking the look of the clouds in Alyson's photo, which was my main goal for this manicure.

saran wrap nails

So far, this was the only picture from the challenge that I've done a manicure for.  I just never got around to doing anything for some of the other weekly pictures that the group members have been posting.  And they've been posting some really awesome photos to use as inspiration, so I'm a little disappointed in myself for not making time to try any other looks.  But there's a lot more photos to come, so I've got a lot more chances to be inspired on the way.

Sunday, July 12, 2015

July 4th Weekend

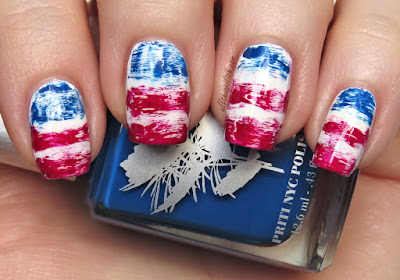
Last weekend, I posted a quick pic on Instagram showing my last minute July 4th manicure.  The day was so dreary, it was raining all morning and showing no signs of stopping.  I knew any original July 4th plans were going to have to wait until the next day.  It was going to turn into a "stay home and watch fireworks specials on TV" kind of night for sure.  I had painted my nails white in the morning, in anticipation of doing some type of July 4th themed look with white as the base color.  But the gloomy day didn't really put me in the mood to paint my nails.  About halfway through the day though, I decided to do just a really quick, dry brush American flag (sorta) design.

Priti NYC Canterbury Bells

I tested it out on my thumb first and was loving the effect, which was the shot I had posted on Instagram.  I was a little indifferent to the finished look though once I had completed the rest of my nails.  It did definitely grow on me over the next few days, and a few of my friends really liked it.  I think the overall effect was much cooler looking in person than it looks in photographs.  And I'm definitely inexperienced when it comes to the dry brush technique, so that's something I think I'm going to need to practice a bit more in the future.

KBShimmer Eyes White Open

KBShimmer Eyes White Open

My base was two coats of KBShimmer Eyes White Open.  The blue and red stripes are both polishes from Priti NYC.  The blue is Canterbury Bells, and the red is called Cherry Ripe.  If you aren't familiar with the dry brush approach, you basically try to scrape as much polish off the brush as you can back into the bottle, and then swipe the brush across your nail.  There were some times where I thought I globbed on a little too much color, so to fix it I just went over a few spots with more white polish.  I finished it off with a coat of Seche Vite.

Priti NYC Cherry Ripe

I hope everyone had a fun and safe July 4th holiday last week.  I definitely enjoyed July 5th a whole lot more than July 4th.  The weather was perfect on Sunday, and there was a great fireworks display put on in my town.  I even snagged a few good shots of the show.


Wednesday, April 15, 2015

Zoya Loredana and Silver Swirls

My nails have been kind of a mess so far in 2015.  I'm not sure if it was the seesaw weather affecting them...one day it's snowing, the next day it's 60...or what the issues were, but I feel like I've had more breaks and cracks so far this year than ever before.  They seem to finally be making a comeback though.  I'm hoping that with the weather starting to level off, and a little extra TLC, they'll be back to normal shortly.  Luckily, I came across a handful of looks from late last year that I had stored away on my desktop, but for some reason just never got around to posting.  This first manicure started off with 2 coats of Zoya Loredana.  On top of that, I stamped a design from Pueen plate PUEEN13 using China Glaze I'd Melt For You.

Zoya Loredana

I didn't really buy many Christmas themed polishes this past winter, but I wanted to get my hands on I'd Melt For You, from the China Glaze Twinkle Collection 2014, specifically to use it for stamping.  Swatches I'd seen of it online reminded me a bit of China Glaze Millennium.  And Millennium, as well as most of China Glaze's chrome-like polishes, always stamps really well.

Zoya Loredana

I'd Melt For You did not disappoint either.  I'm not sure, if worn as a full coverage mani, that I'd Melt For You would have the same mirror like look as Millennium does, but it worked great for stamping.  I need to do a side by side comparison of I'd Melt For You and Millennium to see if I like one more than the other.  Zoya Loredana is a matte finish polish, but I did top this look off with one coat of top coat to protect the stamping.  I think Loredana looks just as great top coated as it does when left as a matte finish.

Zoya Loredana

Zoya Loredana

Tuesday, March 17, 2015

St. Patrick's Day 2015

Happy St Paddy's Day!!!  St. Patrick's Day is one of my favorite holidays, and I'm really not sure why.  I'm not even Irish.  But I do love green and, thanks to the influence of my older sister, I've always had a love of Ireland while growing up.  For St. Patrick's Day this year, I finally busted out my bottle of the Extra Fine version of Lacquistry Amazeballz, and combined it with a little stamping on my other nails.

St. Patrick's Day Nails

I love the extra fine version of Amazeballz even more than the original.  The formula is incredibly smooth, and you could almost get away with a single coat.  I did apply a second coat just to even up the coverage though.  For my other nails, I applied 2 coats of KBShimmer Eyes White Open and topped that with 1 coat of Sephora by OPI It's Real 18K Gold top coat.  Over that I stamped a shamrock and clover pattern from Bundle Monster plate BM-723 using Konad Special Polish in green.  I topped everything with one coat of Seche Vite.

St. Patrick's Day Nails

St. Patrick's Day Nails

St. Patrick's Day Nails

I only wish that I had applied 2 coats of the It's Real 18K Gold top coat on my index and pinky nails, instead of just 1 coat.  With a close-up view like in the blog pics, it's pretty easy to see it on the nails.  But in real life, it's hard to spot that the gold flakes are even there.  I think a second coat would have made them much more noticeable, but I still love how it turned out.  Thanks for reading, and I hope you have a great St. Patrick's Day!

Saturday, February 28, 2015

KBShimmer Spring Collection 2015 - Crellies and Cream

Press Sample

KBShimmer Spring 2015

Tomorrow is March 1st and, while I already feel like 2015 is starting to fly by, I'm definitely enjoying the thought that Spring is around the corner!  So on the subject of Spring, here are the rest of the polishes I had swatched from the new KBShimmer Spring 2015 Collection.

Friday, February 6, 2015

KBShimmer Spring Collection 2015 - Holo Swatches

Press Sample

KBShimmer Spring 2015 Holos

Where did January go?  Seriously.  Where???  One day it was New Year's, then *POOF* I'm watching the groundhog predict 6 more weeks of Winter.  Since January decided to fast forward on me, let's just fast forward a little bit more, to Spring.  Because today marks the release of the new KBShimmer Spring Collection for 2015.  I have a total of 8 out of the 12 new Spring polishes to show you, and in today's post I'm starting out with 4 of the 8 shades.  Keep reading after the jump for my swatches of the 4 new KBShimmer holo polishes.  

LinkWithin

Related Posts Plugin for WordPress, Blogger...