Saturday, December 22, 2012

Christmas Tree Wrapping Paper

Last weekend was the annual Christmas party held by the owners of the company I work for and I wanted to do something new on my nails for the party.  I decided to try out the little abstract Christmas tree design on the newest Bundle Monster set.  It is from plate BM-321.  I was actually planning to use the Christmas tree stamp along with a few other Christmas themed stamps like the gift box and the ornament but I didn't like the way that they were stamping so I decided to just stick with the trees.  I was afraid that the trees would be too plain completely by themselves, so I came across a swirly type design on Bundle Monster plate BM-224 and stamped it a couple times on each nail as a background to the trees.  The final result ended up reminding me of something you might see on Christmas wrapping paper.


For my base color, I used Orly Dazzle.  I stamped the swirl design with Konad Special Polish in white.  Then using Konad green for the tree and Konad red for the tree base, I stamped about four trees randomly on top of the swirls on each nail.


I really like Orly Dazzle as a base for stamping.  I've used it before and I love the way the stamped designs look over the silver background.


I'll probably do at least one or maybe two more Christmas type manicures before the holiday, but I don't know if I'll have time to actually post them until after Christmas.  So if I don't get a chance before Tuesday, here's wishing everyone a Merry Christmas and Happy Holidays!!!

Sunday, December 16, 2012

Christmas Lights

For my second Winter mani of the season, I leaned a bit more towards a Christmas design instead of just a basic Winter theme.  I've been wanting to try out the Christmas light bulb design on the 2012 Bundle Monster plates since I first bought the set, so I figured now was as good a time as any to give it a shot.


I started out with a couple coats of Orly Au Champagne, then went over that with one coat of Sonnetarium Snowfall.  I picked out 4 colors from my Konad Special Polishes to use for the bulbs: orange, blue, yellow and red.  The bulb design can be found on plate BM-318.  For each bulb, I stamped using one of the 4 colors and some Konad Special Polish in green for the little light socket part of the design.  Then I used the same green Konad polish to freehand some wires connecting all the bulbs.


The only issue I had with this design was that the yellow bulbs were a lot harder to see in real life than they are in the pictures.  You had to get really close to see the detail in the yellow bulbs but the other colors really popped well on the white background.  Snowfall over Au Champagne was gorgeous all by itself.  I didn't take any shots of it without the stamping (D'oh!), but it was so pretty that I think I might have to use this combination again at some point this Winter for another manicure.  And I should have a new post up later this week of the design I have on right now, that I did to wear to my office Christmas Party last night.  It reminds me of Christmas tree wrapping paper.

Wednesday, December 12, 2012

December Snowflakes on Plaid

When December rolled around, I wanted to do something winter themed but without diving right into all the Christmas designs just yet.  We haven't had any major snowstorms so far this winter but the weekend I painted this design we did have a few small flurries, so I guess I had snowflakes on the brain.  I decided to stamp some snowflakes over a plaid design.  (Yes, more plaid from me.  I love plaid.  Be warned...'cause there's more coming.)  The chilly weather makes me think of wrapping up in a warm flannel blanket.


It turned out even better than I had pictured it in my head.  I didn't want to take this off at the end of the week.  I started with three coats of China Glaze Recycle.  Then I stamped the plaid design from Konad plate m60 with Konad Special Polish in red, then the same plaid design again using Konad Special Polish in black.  The snowflakes are both Bundle Monster designs.  The spiky looking snowflake is from plate BM14 and the more lace-like snowflake is from plate BM-319.  I just alternated their placement on each nail and stamped them with Konad Special Polish in white, then used a dotting tool and the same white polish to add some dots to fill in the empty space.


I loved the end result.  Loved it hard.  This might be my favorite manicure of 2012 actually.  I can see myself repeating this at some point this winter, with a different plaid under the flakes or maybe even with the exact same colors.  I loved the look of the grey plaid so much.

Sunday, December 9, 2012

Don't Call It a Comeback.

Although I guess you could call it that, it has been three months since I last posted.  Three months exactly actually, which I didn't realize until just right now.  I last posted on September 9th and it is now December 9th.  That doesn't mean that I stopped painting my nails, it just means that I kind of put off posting about them.  I couldn't tell you what the reasons were 'cause I honestly don't know.  I just didn't have the urge to put together any blog posts for a while, didn't even really bother checking in on all the blogs I usually follow.  I think I started to reevaluate the whole nail obsession in the past few months.  I had sort of gotten away from what I liked the most, which was painting my nails and doing designs, and instead got caught up in everyone talking about all the new colors and collections and trying to buy every new, cool thing I saw.  Which left me with a ton of polishes I haven't even used yet and some credit card bills I wasn't too happy about.  So I want to go back to what got me excited about polish in the first place...nail art and basically using what I already own.  I don't need to have every single new polish that comes out.  Not to say I won't buy one or two if something irresistible comes along, but honestly, it's been almost as long as I last posted since I bought a new bottle of polish.  And that doesn't bother me at all!

As I mentioned, I've still been doing my nails this whole time and I have still been taking pictures, so I'm going to try to do a couple posts over the next week or so just to run through what I've had on my nails the past three months.  They will be mixed in with some of the more recent designs because I have a few Christmas type posts that I want to get up this month.  So some stuff will be a little out of order, but really does anyone care?!

So after I wore Cult Nails Deal With It, I tried out two others from the Coco's Untamed collection, Annalicious and Spontaneous.  First up was Annalicious, which I used as a base for a bandanna inspired stamp design.


Like a lot of my stamp designs, I like to test them out on a nail wheel first and when I tested this, the white didn't quite pop out on the red like it does on a real bandanna.  So I stamped the design, from Konad plate m60, with Konad Special Polish in black first then re-stamped with Special Polish in white.  The black shadow made the white pop out a lot more against the background red.


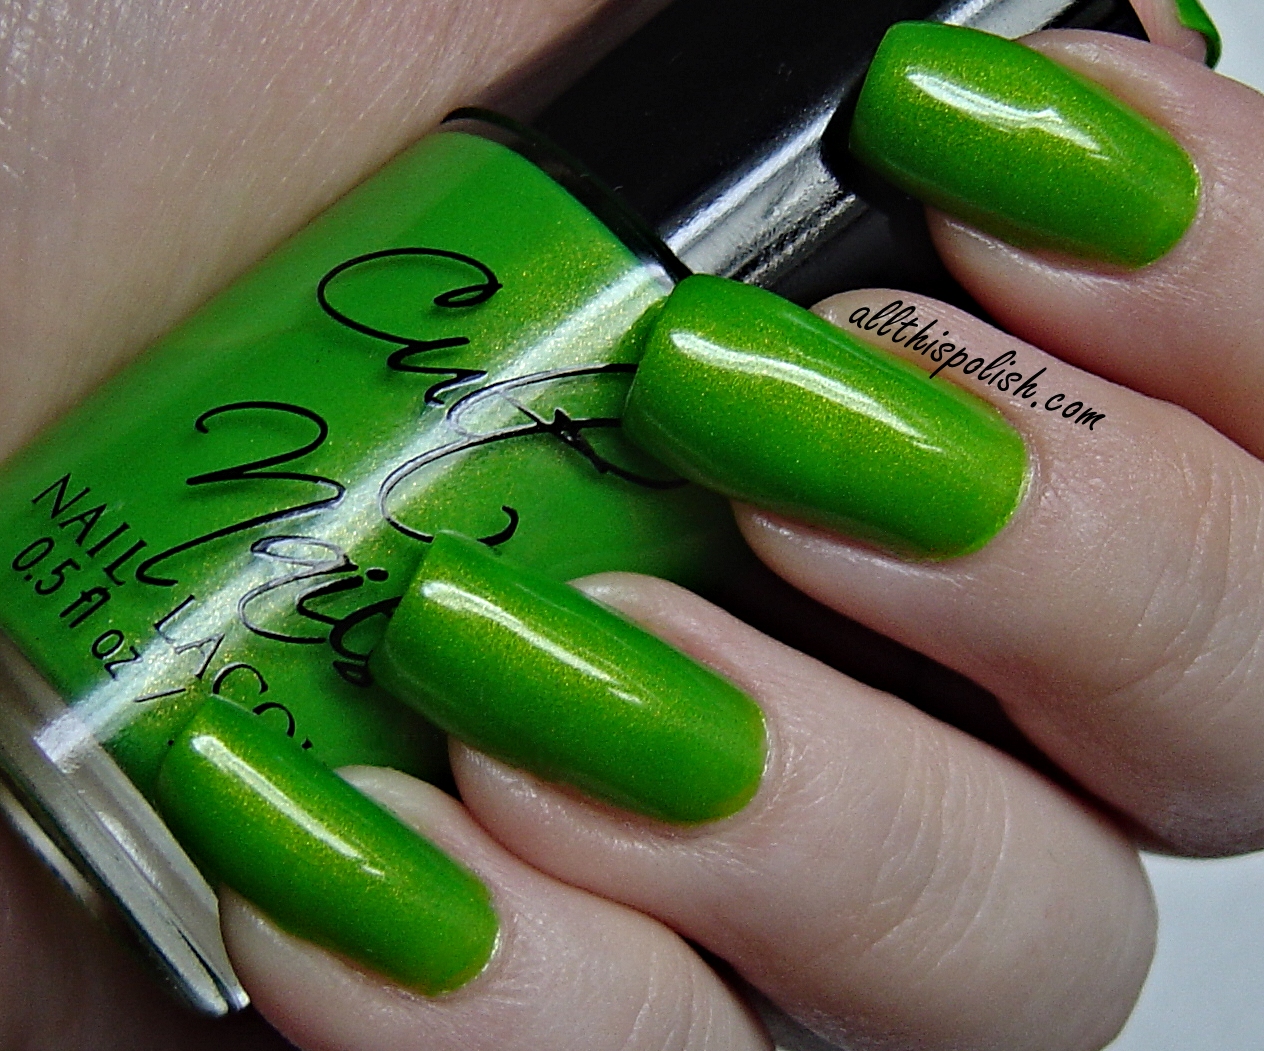
I absolutely loved this and plan to do it with a lot of other colors as a base.  After Annalicious, I tried out Spontaneous.  I also used it as a base for a stamping design, this time I used Bundle Monster plate BM-306 from the most recent 2012 set.  I stamped with Konad Special Polish in pastel violet.


I loved the final look, although my stamping on this one came out a bit blurry.  I'm definitely a Cult Nails fan though.  Easy application, great colors and great wear time on these polishes.  

I've got about eight more designs that I did over the past three months, not counting the two I've done so far in December that are more winter/holiday themed, so I'll probably try grouping two or three together in posts later in the week, like I did with this one.  And I apologize if anyone read the blog post title and now has "Mama Said Knock You Out" stuck in their head, but you know what they say, ladies love Cool James.

Sunday, September 9, 2012

Cult Nails Deal With It

I've been wanting to get a number of polishes from Cult Nails, specifically from Coco's Untamed Collection. So a while back when Cult Nails had their big $7 sale, I ended up buying all 5 colors from the Untamed Collection.  Once they were delivered, I just had to choose which one to wear first!  My favorite color is green, so my instinct was to start with Deal With It.  I was going back and forth on it though so I asked for a few opinions in a Facebook group I belong to and Deal With It ended up being the winner!


I loved this color.  This is one of my favorite types of greens and that golden shimmer mixed in was just insane to look at.  It was even more intense in person.  I almost didn't want to cover it up.  I wore it plain for a day or two just because I could!


Then I finally decided on Konad plate m84 and Konad Special Polish in black to add a simple star pattern.


I ended up wearing a few different Cult Nails colors in a row, so you'll be seeing more of them shortly!

Monday, August 27, 2012

Guest Post at Polished Prisms!

Hey everyone!  Today, I have a guest post up at Polished Prisms for Hannah's Glitterific series!  It's my first guest post and I was so excited to contribute to this series.  Check out the guest post here.  It's all about some awesome glitters from The Hungry Asian!  And if you don't already read Hannah's blog on a regular basis, make sure to subscribe.  She's got some great posts, I know you'll all enjoy her blog!

Thursday, August 16, 2012

Spring ASBMF Challenge #12: May Flowers!

Um, ya...wow, remember this challenge?  You know the one that started in April...that I still didn't finish.

...awkward silence...

Trust me, I had no intention of putting the next challenge post off for this long.  I believe my last challenge post was in June, which wasn't so bad for only having three parts left to do.  But considering that it is now mid-August...well, smooth move exlax!  I think it was just one of those things where, each time I went to paint my nails, I thought of the challenge but wasn't really sure what I wanted to do and just decided, "oh what's one more week?" instead.  Well Sarah, do a little math here...what is "what's one more week?" times 6 weeks?  Answer: way too friggin' long to be procrastinating on finishing this challenge!!!  You may be asking, why even bother?  Well...I don't know.  Even though I feel like a bit of a jackass for putting these last three parts off for so long, there is another part of me that doesn't want to just quit so close to the end and then pretend like it never happened.  So instead, here I am in mid-August with a post on...May flowers...lol.


This is two coats of Styled Out, from the Maybelline Color Show line, stamped with Konad plate m64 using Konad Special Polish in pastel blue.  Styled Out is part of the Denims set of polishes from Maybelline's Color Show line.  This is really the only Color Show polish I was interested in getting when I saw the swatches.  I might even grab a back up bottle since the bottles are only 7ml and this color is stinkin' gorgeous!  My favorite color may be green, but when it comes to polish, I can't resist a sparkly dark blue.  I used two coats but it was near perfection with just one coat.  I'm just crazy and felt like I needed to have a second coat because of some spots that seemed patchy to me, which in reality were probably fine.


The pattern is not your typical flower pattern, but I really like it and have used it a few times before this.  It has sort of a country/farm house feel to it.  Sort of reminds me of a pattern you might find on an old bandana, other than the typical paisley designs you normally see.  I also love the blue on blue look.  I don't stamp enough using something in the same color family as my base color and I really need to do it more often.  I'm getting in the habit lately of over analyzing what to paint on my nails instead of remembering that sometimes the simplest designs can yield the most amazing results.  "Keep it simple, Stupid!"  I have to remind myself of that every so often.


If you hadn't noticed, I decided to set up a custom domain so my blog address is now officially Allthispolish.com, and I'm also experimenting a bit with an updated watermark to match.  I actually bought the domain a couple weeks ago, but thanks to a bit of over zealousness on my part, I managed to screw it up.  It wasn't working and I didn't realize at first that I had done something to directly cause that, so I ended up waiting about a week and a half before trying to investigate what the issue was.  Then, with a little help from a friend at work, I got it fixed.  Here's a hint to anyone who is thinking of buying your custom domain through Blogger...when you get your Google domain registration confirmation email, DON'T activate Google Sites when you click the link to create your administrative account.  In fact, don't even click the links in the email at all, unless you're thinking of using Google Apps to set up a custom email address.  The domain will redirect to the blog on its own within a day or two.  But activating Sites will cause Blogger to think some other blog is already using that domain and it won't redirect automatically.  All you would need to do then is deactivate Sites and add the domain manually to your Blogger settings, but Blogger and Google Apps don't always want to cooperate so it may not get corrected on the first attempt.  Ok, end of rant, hee hee.  It's all good now so who cares!  Now to see if I can get the last two parts of this challenge posted before, oh let's say Christmas, lol.

Saturday, August 4, 2012

Spun Sugar Sparkle

Today I have my second run at the spun sugar manicure.  This one actually looked much nicer in person than in the pictures.  I didn't really like it as much as the first one I did.  I'm not sure why but I think it's because I liked the final look more when I used creams than with the sparkle/glass fleck polishes I used here.  I still liked it a lot, but it didn't have quite the same spun sugar look to it as my first.


I had recently received the mother load of a swap from Jen from The Polished Zombie.  Seriously, it rocked my socks off.  Which was convenient since she also sent me a pair of socks...monkey socks!

Cell phone pic...I was too excited to get my camera out and set up for a nicer shot.

I was anxious to try out the polishes from the Color Club Take Wing collection she sent me, I've been wanting them for a while now.  I started with two coats of Color Club Fly With Me.  I wanted to use more than two colors for the spun sugar part so besides the other two Color Club polishes, Daisy Does It (yellow-hard to see, but it's there, trust me) and Sparkle and Soar (orange), I also used two Zoya's...Charla (blue/green) and Kym (red).


The sparkle/glass fleck polishes gave me a bit of a hard time trying to get consistent polish strings.  You can see where a string of Charla sort of broke half way across my middle finger when I was applying it.  It took a while for the polish to thicken up, and then when they finally did get thick enough to create strings, it suddenly would become too thick super fast.  I can't say for sure if that means that creams work best for this technique, or if there were other factors involved like humidity that could have affected it, but it seemed like I had a much easier time when I used cream polishes for this.


In the end, I was feeling about 50/50 on this manicure.  The Color Club polishes are gorgeous though!  I think next time I'll use one of them as a base for a stamping instead.

Sunday, July 22, 2012

Purple and Polka Dots

Just a quick post to let you know I'm still around!  I've gotten a little blog lazy lately b/c of a lot of real world stuff going on all at once, one of which was a bridal shower I went to for a friend of mine last weekend.  I got a cute purple top with white stripes to wear to it.  I wanted my nails to match but not be too matchy, so instead of doing stripes to match the shirt exactly, I decided to mix patterns and wear purple with white polka dots on my nails.


The purple is OPI Funky Dunkey, which matched the purple in the shirt exactly!  Then I just used Konad Special Polish in white and Konad plate m79 for the dots.


A super simple manicure but I think it was the perfect choice to go with my outfit.

Monday, July 9, 2012

NerdLacquer - All of Time and Space

At some point this past weekend, the plan was for this to become my base for some type of stamping manicure.  But it's so epic on its own, I couldn't bear to cover it up just yet so stamping has been put on hold.  Since NerdLacquers are basically an endangered species now, I wanted to layer it over something to help make the bottle last longer but, at the same time, not affect the basic color of what it should look like on its own.  So I googled swatches to see what others had used and I kept coming across Zoya Bevin.  And as you can tell from comparing it on my nails to the bottle shot, it really is the perfect choice.


I love the combination of the green base and fuchsia and silver micro glitter plus the larger fuchsia and silver hex glitters, but I really can't get over the silver shimmer.  I think the silver shimmer is what brings everything together and just makes it so amazing.  I've been staring at my nails all weekend.


I only have 4 NerdLacquer polishes right now, which I was lucky enough to be able to buy off of another blogger, and they're probably my most prized possessions when it comes to my polish collection.  They're little bottles of awesome.

Wednesday, July 4, 2012

Happy 4th of July!

Happy Independence Day everyone!  Here's my manicure for the holiday this year.  I've had this on since Sunday afternoon.  I was thinking I might do a second manicure for July 4th but I might just end up leaving this on my nails for the rest of the week instead of changing it.


This was supposed to be a simple manicure but it turned out to take a hell of a lot more time than I thought it would, mostly due to uncooperative glitters.  I started with two coats of Zoya Cynthia on all of my nails.  Then I applied one coat of Candy Lacquer's American Pie to three fingers on each hand.  My only complaint with American Pie is that the red hex glitters did not seem to want to come out of the bottle.  It was really weird and a little frustrating because there are a lot of red hex glitters in the bottle, maybe not as many red as blue and white but enough that I expected to get a few on my nails naturally.  But the majority of the red hexes you see on my nails were ones I placed individually with a toothpick.  Other than that, the application was easy and I really like the glitter combo in this polish, especially over such a dark blue like Zoya Cynthia.


For my index fingers and thumbs, I used Wet n Wild Stars & Stripes.  This was the glitter that really gave me a hard time.  When I originally bought it a month or two ago, I pretty much expected that I might need to fish out a star or two during application, but I had to place every single glitter by hand, including the bar glitter!  There is certainly a lot of stars and a ton of bar glitter in various sizes throughout the clear(ish) base (it's a little cloudy looking), but each time I tried to put on a coat with the brush, it looked like I was applying top coat.  I got no stars, I got no bars.  Ok, well maybe two or three measly little itty-bitty bars, but none of the thicker bars and not a damn star.  It was hard just trying to scoop them out from the bottle in the first place.  They just did not want to stick to the brush and come out.  In the end though, I managed to get just enough stars and bar glitter out of the bottle and placed on my nails using a toothpick.  Even though it's a total pain in the ass glitter, I don't regret buying it.  First of all, it's Wet n Wild, so super cheap.  I've spent more on a cell phone app than on this polish.  The stars are a perfect size too...not too big, not too small.  And did I mention the stars are holographic?  I didn't?  Oh, well hey, the stars are holographic!  So ya, it was worth the aggravation.


I applied two coats of Seche Vite and then realized that I probably should have added at least one coat of Gelous first to really cover the stars sufficiently.  But then I thought, well why not put the Gelous on top of the Seche Vite?  So I did and it worked great.  Booya!  The Gelous dried just as shiny as the Seche Vite had been and if I didn't use the Gelous, I probably would have needed another two coats at least of SV to contain all the points on the star glitters.  Even a friend at work made a comment on Monday, while examining my nails, that you couldn't feel the stars at all.


Here's hoping everyone has a great holiday today!  Enjoy the parades, barbecues, fireworks and hopefully some good weather!

Saturday, June 30, 2012

Spring ASBMF Challenge #11: Eggs and Chicks

If this post wasn't part of the ASBMF challenge, I might have instead titled it "Why Sarah doesn't do freehand."  Although, let's be honest here folks, if it wasn't for the challenge then this post wouldn't even exist.  This is waaaaaay out of my comfort zone.  I envy people who can draw those cute little animals on their nails.  Did you ever see Simply Rins Little Pink Pigs?  Adorable!!!  And she makes it looks so easy.  I love them.  But I doubt I would be able to recreate them.  Granted, I haven't tried anything like this using acrylic paints yet, which does seem like it would be easier to draw with.  But even with paints, I highly doubt I would come even close.  My little pink pigs would come out looking like they had one too many rounds at the bar last night.  Or that I had one too many rounds and then tried to paint my nails in a drunken stupor!  Sadly though, I couldn't seem to avoid trying freehand on this part of the challenge.  It may be the Spring Challenge, but thanks to my procrastination, it's the last day of June.  So I didn't want to make little chicks and pastel eggs or anything that would have been more Easter time appropriate.  And I didn't even have any useful stamps to Konad my way out of this.  My inspiration was actually a picture I had seen a hundred times before in a wallpaper app on my cell phone.  It's one of those dorky-funny kind of pictures and I hadn't really thought about using it for nail art before until I was scrambling today to try and knock out this part of the challenge already.


My version has a few slight differences, besides looking no where as cute as the original illustration.  I reversed the position of the cow and chicken so I could put the chicken on my index finger instead of trying to fit her on my pinkie and I added spots to the cow's face.  In the pic, clearly a cow even without spots on his face.  On my nails, some sort of weird white horse head attached to a cow's body.  Horsecow?  Cowhorse?  Corse?  Ya...so I decided to spot his big ol' noggin too.  Then I drew the cow-spotted egg (or something sort of resembling an egg-like shape) on my thumb.  Anyway, I'm just posting one picture, I'll spare you from having to look at more.  I present my Eggs and Chicks (and Cow).


Phew!  That hurdle is out of the way.  May flowers should be easy enough and I'm actually looking forward to the newspaper transfer compared to this freehanded flop!  Then it's just the design of my choice left to do.  Oh, and in case you were wondering, here's a quick run down of the colors used:
base - Zoya Bevin
bodies/egg - Wet n Wild French White
cow spots/eyeballs - Wet n Wild Black Creme
nostrils/horns - Zoya Caitlin
hen's comb - Zoya Sooki
feet/beak - China Glaze Sun Worshipper

Just a reminder that, while I'm still struggling with Spring lol, the rest of our Facebook group is just starting the Summer challenge.  There's still plenty of time to start up if you're interested.  Check out our group page to join!

Sunday, June 24, 2012

KBShimmer Orange-A-Peel

Recently, KBShimmer moved the sale of their nail polishes to their regular retail web site, KBShimmer.com.  Even though the polishes are going to be listed online at all times for ordering, rather than dealing with the Etsy free-for-all, you better believe I was there to place my order the second the polish went live!  I could have easily bought a mountain of polish, but I decided to limit myself to the two I wanted most.  I ordered Proud Peacock, which I was too slow to grab on the last Etsy-go-round, and Orange-A-Peel, which is part of the new neon collection.  I was a little torn between Orange-A-Peel and Orange Pop, but after comparing swatches of the two online, I went with Orange-A-Peel because I found the glitter combination in Orange-A-Peel more interesting.  A few days later when my order arrived, I knew I had made the right choice!


Orange-A-Peel is kind of a deceiving polish.  When I was looking at the bottle in person, I was thinking it didn't seem as neon as I had expected.  It almost looked like it was leaning more towards pastel orange.  But then I put it on my nails and the color really started to pop.  It's a super bright neon and I don't think the pictures really can capture the glow that comes off your nails wearing this.  I'm not sure if it's the POUNDS of glitter packed into the polish that makes the color look more washed out in the bottle, but even in a dim light, the neon on your nails is really strong and noticeable!  As stupid as it may sound, if I was anywhere near a mirror while wearing it, I would catch glimpses of my nails reflected in the mirror out of the corner of my eye and totally distracted.  All pictures are of 3 coats of Orange-A-Peel, 1 coat of Gelous and 1 coat Seche Vite.


I'm really loving KBShimmer's polishes.  I've worn two so far and cannot wait to try out the other two I own.  Be sure to check out all the polishes currently on their site as well as all the handmade soaps, lotions and other goodies they have available.  Besides the polish, this time I made sure to buy one of the soap samplers.  I hadn't even unwrapped the soaps yet and I could smell them throughout my house.  They are awesome.  They currently have 23 different scents available and will be adding several more soon.  So if you're at all like me and hate trying to just pick one of anything, the sampler is a great and inexpensive way to test out 6 different scents at a time before you decide to order any in the full size bars.

Wednesday, June 20, 2012

Spring ASBMF Challenge #10: Butterflies!

As much as I love the look of the Monarch butterfly wings manicure (and want to eventually try it myself), I decided to use one of the gazillion butterfly stamp designs I have that I never ever use, so at least now I can say I've used one of them!


It's not that I don't like butterflies.  I do.  If I see a real butterfly, don't bother trying to carry on a conversation with me until it's gone 'cause I'm gonna be all "Ooh, a butterfly!" and just watch that little bugger flutter around and around until it flies away.  But butterfly patterns, decorations, etc. aren't really my thing.  So I've never had the urge to use one of the ump-teen butterfly designs available between all the different plates I have from Konad, Bundle Monster, Red Angel, etc...  I have had the DRK-A plate for a few months now though and have yet to use it.  Even though I'm not big on butterfly designs, the DRK-A plate has this full nail butterfly design that kinda caught my eye from the first day I saw it.  The butterflies are a bit more cartoonish, with a hand drawn look to them that I like.  So for this manicure, I decided to use a few polishes from the New York City Ballet Collection.  I started with 3 coats of OPI Care To Danse? to make it more opaque.  Then I layered on one coat of Pirouette My Whistle, another coat of Care To Danse? and finally topped it off with one more coat of Pirouette My Whistle.  For the butterfly pattern, I used Konad Special Polish in Dark Purple.


I like the way this turned out.  I really like the the look of these colors together and I love the jelly finish of the OPI Ballet colors, even more than I though I would when I bought them.  The stamping came out decent enough.  My only issue was my impatience, as usual, with waiting long enough to top coat when I stamp.  I have a few little smudges on my pinkie and ring finger.  It may seem dry enough, but the stamped polish feels almost perfectly dry as soon as you stamp it on, considering how thin of a layer of polish it is you're dealing with.  So you really have to give it enough time to set up and dry all the way before trying to spread a nice big glob of top coat over it.  This time, I didn't wait long enough and got a few smudges.  Not too noticeable though.  It didn't drive me crazy enough to redo them.  I've gone all week so far with smudgy digits.


Just a few more designs to go.  There is a Summer Challenge starting this Friday but I've decided to pass.  Especially since I would be overlapping the start of that challenge with the end of this one.  I'm planning to do a post probably once a week though linking either to the new manicures that week from the group or maybe one post a week for each part of the challenge and then I'll update links as people do them.  I'm not sure which way I'm going to do it just yet.  But there are some super talented ladies in our group, so even though I'm not going to participate this time, I still want to be sure to share the amazing manicures I'm expecting to see these ladies come up with!

Hannah from Polished Prisms
Amanda from Mandy's Polish
Heidi from DIY Polish & More
Katee from A Girl and Her Polish
Charlotte from Charlotte's Nails
Tess from Football and Fingernails
Karine from Karinea0a
Victoria from Manicurator
Sharon from What Color is My Coat?
Ashley from One Nail To Another
Dani from Rustic Comfort
Sue from Creative Nail Design by Sue
Amanda from Counting Down to Bliss
Kayono from Neues vom Kellerkind
April from Munia's Nails
Sharra from The Blahg
Jess from Nearly Natural Nails
CR from Color Me Silly
T from Mami Blogs
Alyson from Beads. Nails. Food.

LinkWithin

Related Posts Plugin for WordPress, Blogger...